!WARNING! the text, images and descriptions below may be graphic or disturbing to some individuals. the purpose of this post is to accurately explain butchering methods to be used to process whole animals, that yes, were once happily trotting around in a field, and now are not.
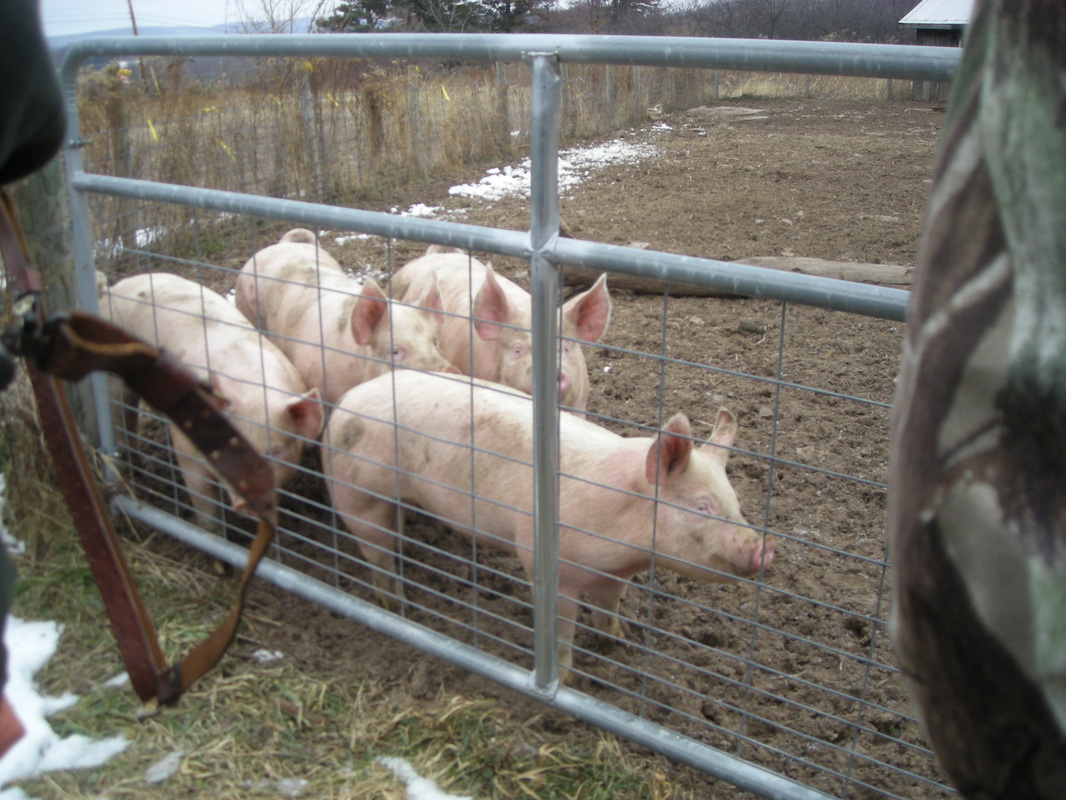
Once a year, our friend T butcher's the pigs he raises on a friends farm. each year the husband and i have the honor of butchering one for T's Neice K. I look forward to these expereinces as they involve hands on learning, homemade wine, stories from the old days and time with my darling (not to mention the chance to grab all the rare bits you can't other wise get, see the link below for head cheese)
OVERVIEW
Last year T was rather hesitant to have me help him butcher. i am not a large girl and i relaize its often not a females feild, but i enjoy this type of work and proved myself boning out pork butts. so this year i received a call out of the blue that next week was indeed the pig killing week...i was even invited to do the deed myself! ha!
anyway, the point of this post is to cover the basics from dropping the pig to packaging the meat for the freezer. there are a variety of cuts that one can make, depending on preferance, time and tools on hand. i will go over each of these and explain the benifits of each.
one important item to not is that the use of a smoker and a very large boiling pot is going to be needed to produce a traditional holiday ham, similar to those you buy in the store (only way better!)
the boiling pot is essencial due to the fact that a traditional smoked ham is produce with the skin still on. pork skin = absolute delicousness. but getting nasty wirery pig hair off of pork skin = a huge pain in the buttcuss.
removing the pigs hair is important for creating hams or for producing pigs that will be roasted whole. this can be accomplished in two ways, either by boiling (which is what most large manufacter's of smoked hams use) or by alternatly singeing the skin with a blowtorch and power washing the skin clean ( this take forever and smells not to great) the boiling meythod is best, this is where the whole animal is dipped in extremely hot boiling water and then scraped tp remove the hair. while it is the easiest way to remove the pigs hair, this meythod is rather hard to set up. to do this, one needs a soarce of heat large enough to bring a tub of water, that is large enough to fit a 200 pound plus pig, to a boil. doing this can be difficult and may result in an unnessisary expenditure of energy if only butchering one pig. because of this i reccomend butchering muliple pigs at once or simply skinning the few animals you are going to butcher.
skinning the pig does result in a loose ham, but a bit of butchers twine fixes this easily and results in a skinless ham that can be baked fresh or smoked.
so back to the beginning. to end an animals life quickly and respectfully is best and this is often accomplished with a quick head shot. ideally directly between the eyes with a caliber that will penetrate the skull easily.
KILLING
the next step is to
1.) keep the other pigs clear of the animal that has been killed and
2.) make sure the pig is effectily 'bled'
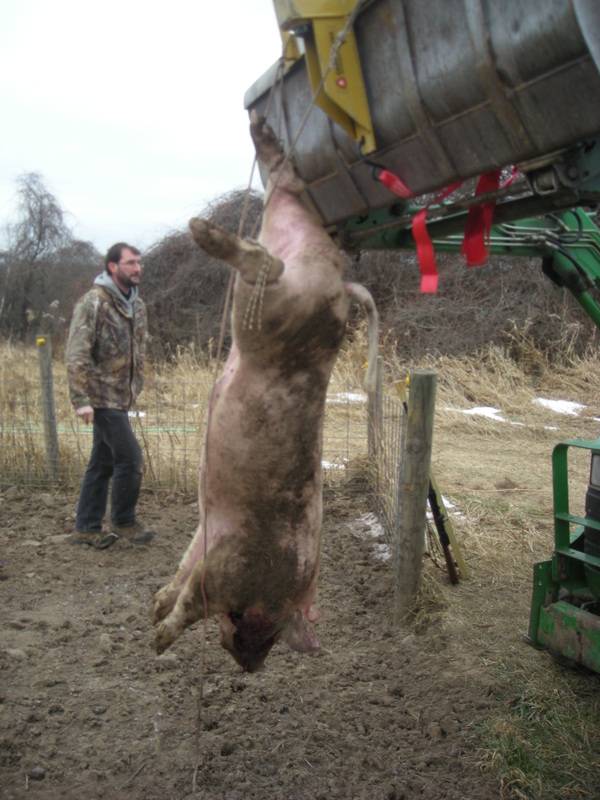
to note, you do need to be ready to chase the other pigs off as they can sometimes tend to be canabalistic with the blood. the meythod that we used last year to bleed the pig was to place a bar between the hind legs of the pig (snug behind the tendons, much like stringing up a deer) and useing a lift with a bucket to suspend the animal. at this point the animal would have its throat slit and allowed to drain for 30 minutes to an hour and a half.
anouther way to bleed the pig is to get into the pen right after shooting the pig and slit the animals throat, this allows the body to expell most of the animals blood through a main artery in natural post-death spasms
either meythod works fine as llong as the animal expells most of its blood. clots are unpleasant to deal with later on and can have a poor effect on the quality of the meat.
Last year T was rather hesitant to have me help him butcher. i am not a large girl and i relaize its often not a females feild, but i enjoy this type of work and proved myself boning out pork butts. so this year i received a call out of the blue that next week was indeed the pig killing week...i was even invited to do the deed myself! ha!
anyway, the point of this post is to cover the basics from dropping the pig to packaging the meat for the freezer. there are a variety of cuts that one can make, depending on preferance, time and tools on hand. i will go over each of these and explain the benifits of each.
one important item to not is that the use of a smoker and a very large boiling pot is going to be needed to produce a traditional holiday ham, similar to those you buy in the store (only way better!)
the boiling pot is essencial due to the fact that a traditional smoked ham is produce with the skin still on. pork skin = absolute delicousness. but getting nasty wirery pig hair off of pork skin = a huge pain in the buttcuss.
removing the pigs hair is important for creating hams or for producing pigs that will be roasted whole. this can be accomplished in two ways, either by boiling (which is what most large manufacter's of smoked hams use) or by alternatly singeing the skin with a blowtorch and power washing the skin clean ( this take forever and smells not to great) the boiling meythod is best, this is where the whole animal is dipped in extremely hot boiling water and then scraped tp remove the hair. while it is the easiest way to remove the pigs hair, this meythod is rather hard to set up. to do this, one needs a soarce of heat large enough to bring a tub of water, that is large enough to fit a 200 pound plus pig, to a boil. doing this can be difficult and may result in an unnessisary expenditure of energy if only butchering one pig. because of this i reccomend butchering muliple pigs at once or simply skinning the few animals you are going to butcher.
skinning the pig does result in a loose ham, but a bit of butchers twine fixes this easily and results in a skinless ham that can be baked fresh or smoked.
so back to the beginning. to end an animals life quickly and respectfully is best and this is often accomplished with a quick head shot. ideally directly between the eyes with a caliber that will penetrate the skull easily.
KILLING
the next step is to
1.) keep the other pigs clear of the animal that has been killed and
2.) make sure the pig is effectily 'bled'
to note, you do need to be ready to chase the other pigs off as they can sometimes tend to be canabalistic with the blood. the meythod that we used last year to bleed the pig was to place a bar between the hind legs of the pig (snug behind the tendons, much like stringing up a deer) and useing a lift with a bucket to suspend the animal. at this point the animal would have its throat slit and allowed to drain for 30 minutes to an hour and a half.
anouther way to bleed the pig is to get into the pen right after shooting the pig and slit the animals throat, this allows the body to expell most of the animals blood through a main artery in natural post-death spasms
either meythod works fine as llong as the animal expells most of its blood. clots are unpleasant to deal with later on and can have a poor effect on the quality of the meat.

GUTTING
having the pig strung up offers a few perks along with draining, and that is that the pig is not only ready to transport, but dressing the animal is an absolute dream. once you open the animal up, starting right above (if the animal is upside down) the genitals and continueing to the breat plate where the ribs meet. when making this incision, be very careful with your knife and make sure to only peirce the skin and the diafram of the animal and not the guts themselves. you are better off taking it slow and delicate if you are unsure. there is no rush here, because if you peirce the intestines of the stomache the mess, and the smell, is an increditable trouble. so go slow here!
after a strait line has been made from near the anus to the rib cage, be sure the the slit in the animals throat goes all the way through the windpipe. this will make your life much easier when it comes to removing the innards.
cut down and around the hole of the anus from the outside, so that when you begin removing the innards you will be able to pull it down and through in its entirety. this is nice if done correctly because then nothing from inside the intestines gets out. you may need to make need to make some additional cuts from the inside of the animal, when opened, to get the intestine and the anus to pull out together. just be patient and careful and look at where and what you are seperating.
start up where you make the first cut above the genitals, pull back the flaps and do not be afraid to widen your opening. if you push the innards aside, you will be able to see the white 'lining' that is surrounding the animals guts. begin to cut this away from the interior wall of the animals sides, being careful not to nix the meat beyond the diaphram. there is good stuff in there, including the pig's tenderloin.
as you begin to free the diaphram from the inside of the animal, the innards will begin to fall down and out, this is good, let gravity do its work, and continue to seperate the diaphram as more of it becomes visable. hopefully you have fully severed the windpipe and intestine leading to the anus before this point. if you have, when you reach down and into the animal to finish cleaning out and around the lungs and heart, you will be able to pull the whole mess right up and out.
Once you have removed the innards fully (add tossing them anywhere on the ground is fine for the moment, we usually drop them down in the woods for coyotes later).
at this point i usually take a moment to salvage the heart and liver from the pile. the heart i seperate at the nearest point to the organ that i can without marking the organ ( you can trim this more later). the liver is a large double lobed organ and will be the darkest colored peice in the lot. when you pick this up just sever at the nearest connection point, rinse and add to a bag with the rinsed heart. some folk also keep the kidneys, these are small, golf ball sized organs that will usually stay fixed to the inside walls of the animal and can be retrieved when doing final cleanups before butchering.
after the innards have ben removed, i like to go back into the opening and clean out the animal a little better. make sure that all of the diaphram, spare blood, arteries and random organs such as kidneys are removed. not ever in a pig, but often when cleaning out poultry i have found that the lungs and heart will remain in the chest cavity, double check to make sure these are cleared. if hanging the animal up side down, i like to pull it back by the ears. this pushs the opening in the neck forward and expells the blood that has pooled there. this makes your job alot less messy when severing the head.
once your animal is cleaned on the inside, you should at least rinse the skin with a house, after dieing that animal generally falls over and get pretty dirty. this is most important if boiling or searing ans powerwashing the skin. we skinned our animal entirely, but still rinsed it pretty good as we did not want the chance of dirtying the meat underneath.
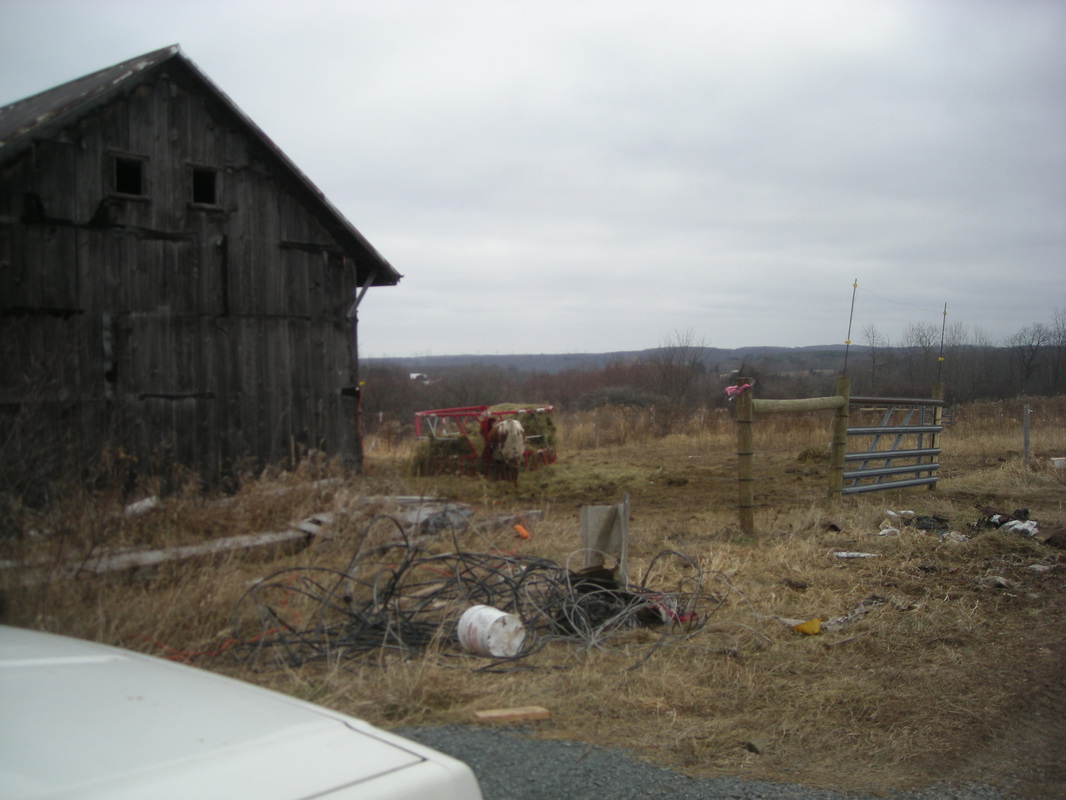
we butchered in December, so the weather was quite biting. generally this is a good thing, meat should be processed in tempertures between 35 and 45 degrees. lower and it freezes, warmer and you rick spoilage. this day was around the lower 30s and the wind was biting, so we relocated into a barn shed to skin the animal. i would not recommend a heated room, this was simply a wind block.
sorry friends, there is no warmth in butchering animals
at this point i usually take a moment to salvage the heart and liver from the pile. the heart i seperate at the nearest point to the organ that i can without marking the organ ( you can trim this more later). the liver is a large double lobed organ and will be the darkest colored peice in the lot. when you pick this up just sever at the nearest connection point, rinse and add to a bag with the rinsed heart. some folk also keep the kidneys, these are small, golf ball sized organs that will usually stay fixed to the inside walls of the animal and can be retrieved when doing final cleanups before butchering.
after the innards have ben removed, i like to go back into the opening and clean out the animal a little better. make sure that all of the diaphram, spare blood, arteries and random organs such as kidneys are removed. not ever in a pig, but often when cleaning out poultry i have found that the lungs and heart will remain in the chest cavity, double check to make sure these are cleared. if hanging the animal up side down, i like to pull it back by the ears. this pushs the opening in the neck forward and expells the blood that has pooled there. this makes your job alot less messy when severing the head.
once your animal is cleaned on the inside, you should at least rinse the skin with a house, after dieing that animal generally falls over and get pretty dirty. this is most important if boiling or searing ans powerwashing the skin. we skinned our animal entirely, but still rinsed it pretty good as we did not want the chance of dirtying the meat underneath.
we butchered in December, so the weather was quite biting. generally this is a good thing, meat should be processed in tempertures between 35 and 45 degrees. lower and it freezes, warmer and you rick spoilage. this day was around the lower 30s and the wind was biting, so we relocated into a barn shed to skin the animal. i would not recommend a heated room, this was simply a wind block.
sorry friends, there is no warmth in butchering animals
SKINNING
you can remove the head before or after skinning, before is perhaps easier, as you dont have to cut the skin flap from the body off first. i reccomend preserving the head for head cheese.
Now to begin the process of skinning the pig. or searing and soaking or boiling, but those are for anouther post.
as a side note, pig skin is highly desirable to local tatto oparlors. apparently a pigs skin is the closest thing to human skin that budding tatooist can practice on without marring someone for life. perhaps check with a few to see if any are interested in purchasing your pig skin
to preserve the integrity of the feet for use as 'pigs feet,' i would reccomend first cutting an incision around each of the legs at the point you want to sever them from the rest of the shank. we did this right below the knee joint , or rather ' above' if you consider that the animal is hanging upside down. (pigs feet are made with the skin on and boiling the feet to remove the hair is much easier then boiling the whole pig)
from the place you made your incision pull out the skin and make a slit downward on the inner 'thigh' of the leg to the opening you made to gut the pig. from this point you will be able to pull 'out' the skin and see the connective tissue that lies between the skin and the meat. the skin can almost be 'peeled' off, but it is good to help it along with the knife. work from the top (the animals rear) and pull/cut the skin off the carcass.
when you reach the 'belly' you will see that some flesh is hiding between the skin and the meat. a 260lb pig is not nessisarily a 'bacon pig' but you can get some from this area, and if desired, remove this flaps skin on to boil and shave later.
continue to the base of the neck, where you will either reach the empty shaft and be able to pull the skin clear, or you will reach the head and need to cut an incision similar to the one you used on the legs to seperate the skin.
your animal is ready to butcher.
BUTCHERING
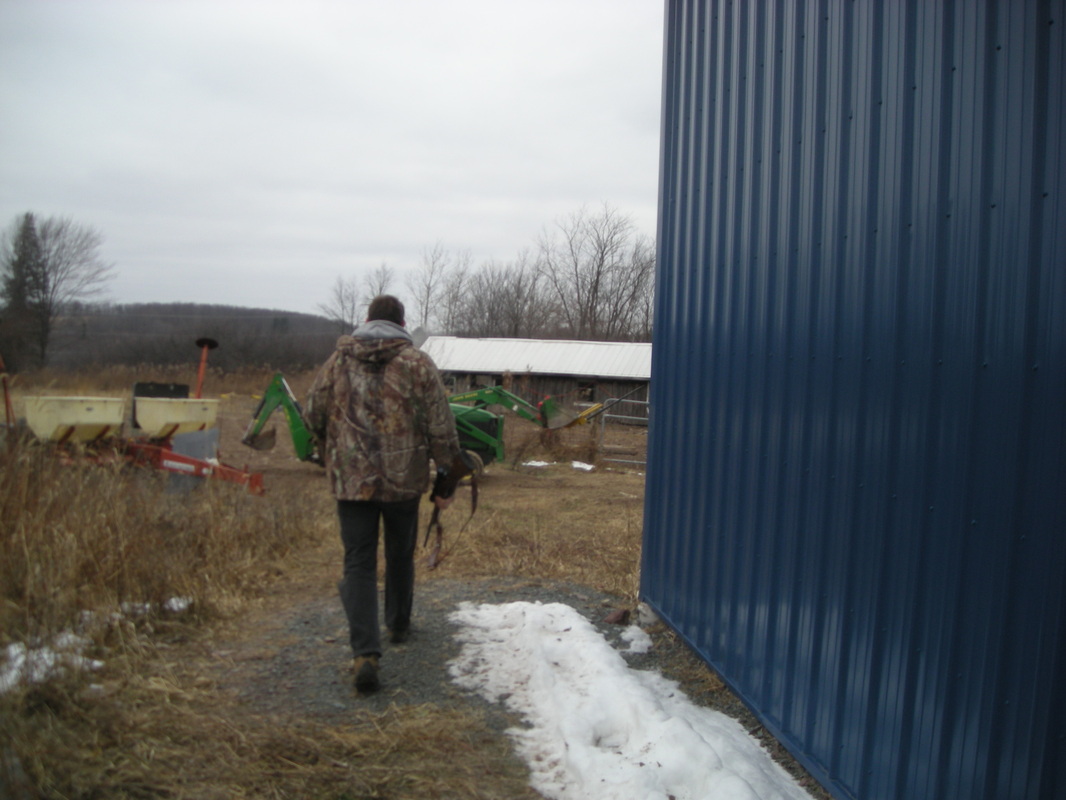
Once we have the animal skinned and ready to butcher, we normally transport to a nearby garage where we have all our supplies. you are going to need
1.) a variety of good sharp knifes (a small pairing knife, a butchers blade, a boning knife, and a hack saw)
2.) butchers paper, a cryovac machine with bags (my preferance), or syran wrap with tape and freezer bags
3.) a sturdy table
4.) an engine lift, deer hoist, tractor or other means for supending the animal
5.) an electric 'saw-zalw' or power saw
6.) a band saw
you can just as easily process the animal at your current location granted you have these supplies, we just find relocating easier with the set up that we have. do make sure that your animal is very firmly secured to whatever it is suspending from. one of the worst things that can happen is to have the animal slip or fall while you are in the process of using a sharp knife or the electric saw.
TENDERLOINS
the tenderloins are the first peice of meat you need to remove from the animal. this is the least used muscle on the animal, and therefor, as the name suggests, the tenderest. these muschles lie along the spine of the animal on the inside of the body cavity. they are largest at the rear of the animal and peter out as the extend up the spine towards the rib cage. this is why bone in 'loin end chops' will have a darker meat on the other side of the bone. that is the tenderloin. on a cow, the same cut is called a 'porterhouse'
work your fingers under the meat that is lieing against the spine and begin to feel and pry the tenderloins from place. this should be relativly easy and the meat should pull free with very little assitance from a knife. place this meat aside and package individually. i like to cryovak them as roasts with a marinade. but if desired they can be cut to medallions. do not over cook these!
CHOPS
there are a few ways that you can process your chops. for deer hunters this is the 'backstrap' of the pig. for those familar with beef, this is where you would find the 'strip steaks' and 'ribeyes' of the pig. for those that like pork, here is where you find the loin end, center cut, and rib end, boneless, or bone-in, chops and roasts.
BONELESS CHOPS & ROASTS - boneless chops are relativly new to the market. traditionally bone-in chops and roasts were more sought after. in recent years, folks have begun buying the boneless variety and this is benifical to the butcher as this is by far the easiest way to process 'the chops'
for Boneless chops i remove the meat second only to the tenderloins and then follow with the shoulders, ribs, and hams
to remove boneless chops in one clean sweep, i prefer to follow the same procedure we follow when processing a deer and remove them first. to do this look at the animal from the back. look to where the tail has been removed and trace the line of the spine down. you will see what looks like an upside down 'V' where the hams meet the chops. cut along the lines of the 'V' down to the bone. this is the loin end of your chop. now slice down the lines on either side of the spine. be careful to angle your knife inward to the spine, this way you are sure to get ALL of that delicious chop meat!
much like skinning the animal, you can rely on a 'pull and cut' method. the meat should free from around the spine and back easily, with only small assistances needed from the knife.
once you reach the end, look for where the muscle continues up and into the shoulder, it will begin to 'peter out' much as the tenderloin did. being careful not to nick the shoulder meat (the pork butts) release the chops from the surounding muscles and pull free.
table the meat. and picture the meat divided into thirds. the third you seperated first, from the rear of the animal, is considered your loin, the center third is the center, and the third from the shoulder area is the rib section. you have three options. chops (these can be anywhere from 1/4 inches thick to 3 inches thick), roasts, or a combination of both. i prefer the later, using the rib end center cut for chops (the rib being 1 1/2 inches thick, and the center being 2 1/2 thick for stuffing) while reserving the loin section whole to cook as a roast
Bone-In Chops and Roasts - for bone-in chops and roasts i normally remove the shoulders of the animal first, then the ribs, followed by the chops then the hams
first remove the shoulders from the animal. at this point you will need to make a deep incision in the meat of the ribs to mark where you will remove the ribs. choose a spot close to the meat of the chops but allow some space for the 'bone end' of the chop, if you are doing bone-in chops you may also want to leave the tenderloin in to acheive the 'porterhouse' effect with your loin end chops.
if you intend on making a 'crown roast' out of your chops, i would reccomend leaving your bones a tad bit longer for easier cleaning and tying.
Once the ribs are removed, look to the top of the chops are (near the point of the 'V' we discussed earlier) and make and incision to the bone of the spine. you can either seperate the spine manually, by getting between the joints of the bone (my preferance) or you can cut down to the bone through the meat and then use the electric saw to sever the spine. at this point you can table your chops.
for the next part you are going to need a band saw. cutting bone in chops can, theoretically, be done by usenig a knife to cut to the bone and then useing the electric knife to split the bone. chops are sloppy this way though, and iwhile i might opt to do bone in roasts this way if nessisary, i would opt for boneless chops if i did not have a band saw.
if you DO have a band saw (you lucky dog you!) choose how you would like your chops cut. look at the part you first from the animal (near the rear) those first 6 inches (approx.) would be the LOIN END, i prefer to use this area as a roast as it is drier then the rib end. the next 6 inches is the LOIN CENTER, again a good option for this is a roast, but they do make a decent, though lean, chop. (hint: cook it with a cream sauce) the next is the center cut of the pork loin, these are the most popular of the chops you will see in the store (center cut pork chops) and i like then cut 2 1/2 to 3 inches thick with a slice made in the center of the meat to create a pocket for stuffing.
the next 6 inches is the rib center then the following 6 is the rib end (if you run out of inches, adjust your measurments by how long the loin is, all these sections will always be there, its just a matter of how big they are) i prefer the rib end for thinner chops. this meat is fattier and well marbled for quick pan frying, and simple preperations.
please continue to part two at the link below.....
 RSS Feed
